Friday, December 23, 2022

Almost Christmas

Two days to go to Christmas, the tree is decorated, and the grandchildren are full of anticipation and excitement. We had a hilarious game of charades, a firm favourite of all four children. I even performed such a convincing act that my son-in-law guessed immediately that the word I had to act out was 'popcorn'!

I hope you have a happy Christmas and peaceful holiday season. 'Till next time, happy stitching!

Tuesday, December 6, 2022

Delicious colours

I'm playing with these delicious pastels. Paternayan wool, also known as Paterna, is lovely for stitching on 14 count canvas. 

I found the soft ice-cream colours at the All Threads Embroidery shop in Brisbane. What a marvellous little shop it is for anything embroidery! It seems that I was fortunate to find any Paterna wool there at all. In future they will be stocking only Appletons crewel wool because of the continuing Paternayan supply issues. 

In my last post here, I was looking forward to a trip to South Africa to visit family. Well, things don't always work out the way we want them to and I ended up in bed with flu instead and had to cancel my flight. So, I have no travel news to share with you. 

I hope your plans for the festive season are going well. Our Christmas tree and decorations have just gone up with lots of help from my grandchildren. It's a bit later than usual but still in plenty of time to sprinkle some pre-Christmas cheer.

Till next time, happy stitching.

Tuesday, November 1, 2022

Dressing a Scroll Frame

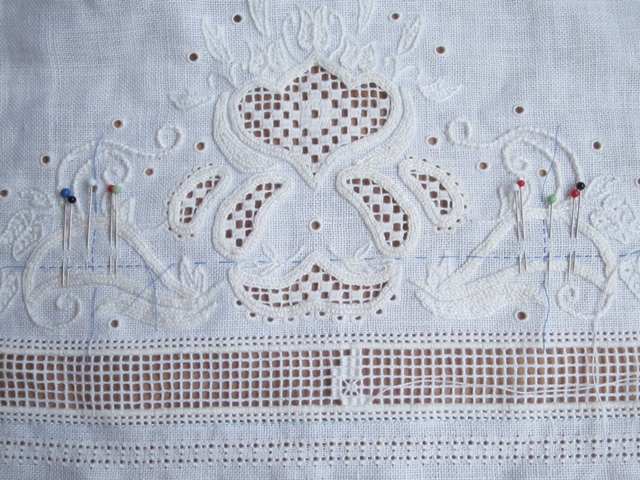
Since refurbishing my scroll frame, that I wrote about in my last post here, I've now attached my linen to the frame. That too was quite a lengthy process. The book Whitework by Lizzy Lansberry, a Royal School of Needlework publication, and Jenny Adin-Christie's video on dressing a slate frame were both very useful guides (although a slate frame and a scroll frame are slightly different). These photos are a record to remind me of how I did it.

 To begin, I ironed the shop creases out of the linen and pulled a thread one centimetre from the edges.


That made it easy to fold over a straight hem and machine stitch it in place on all four sides. It's a fine linen and I thought it needed reinforcing. The side hems weren't a problem when the linen was later rolled onto the scroll bars, though it could be the case with a heavier linen.


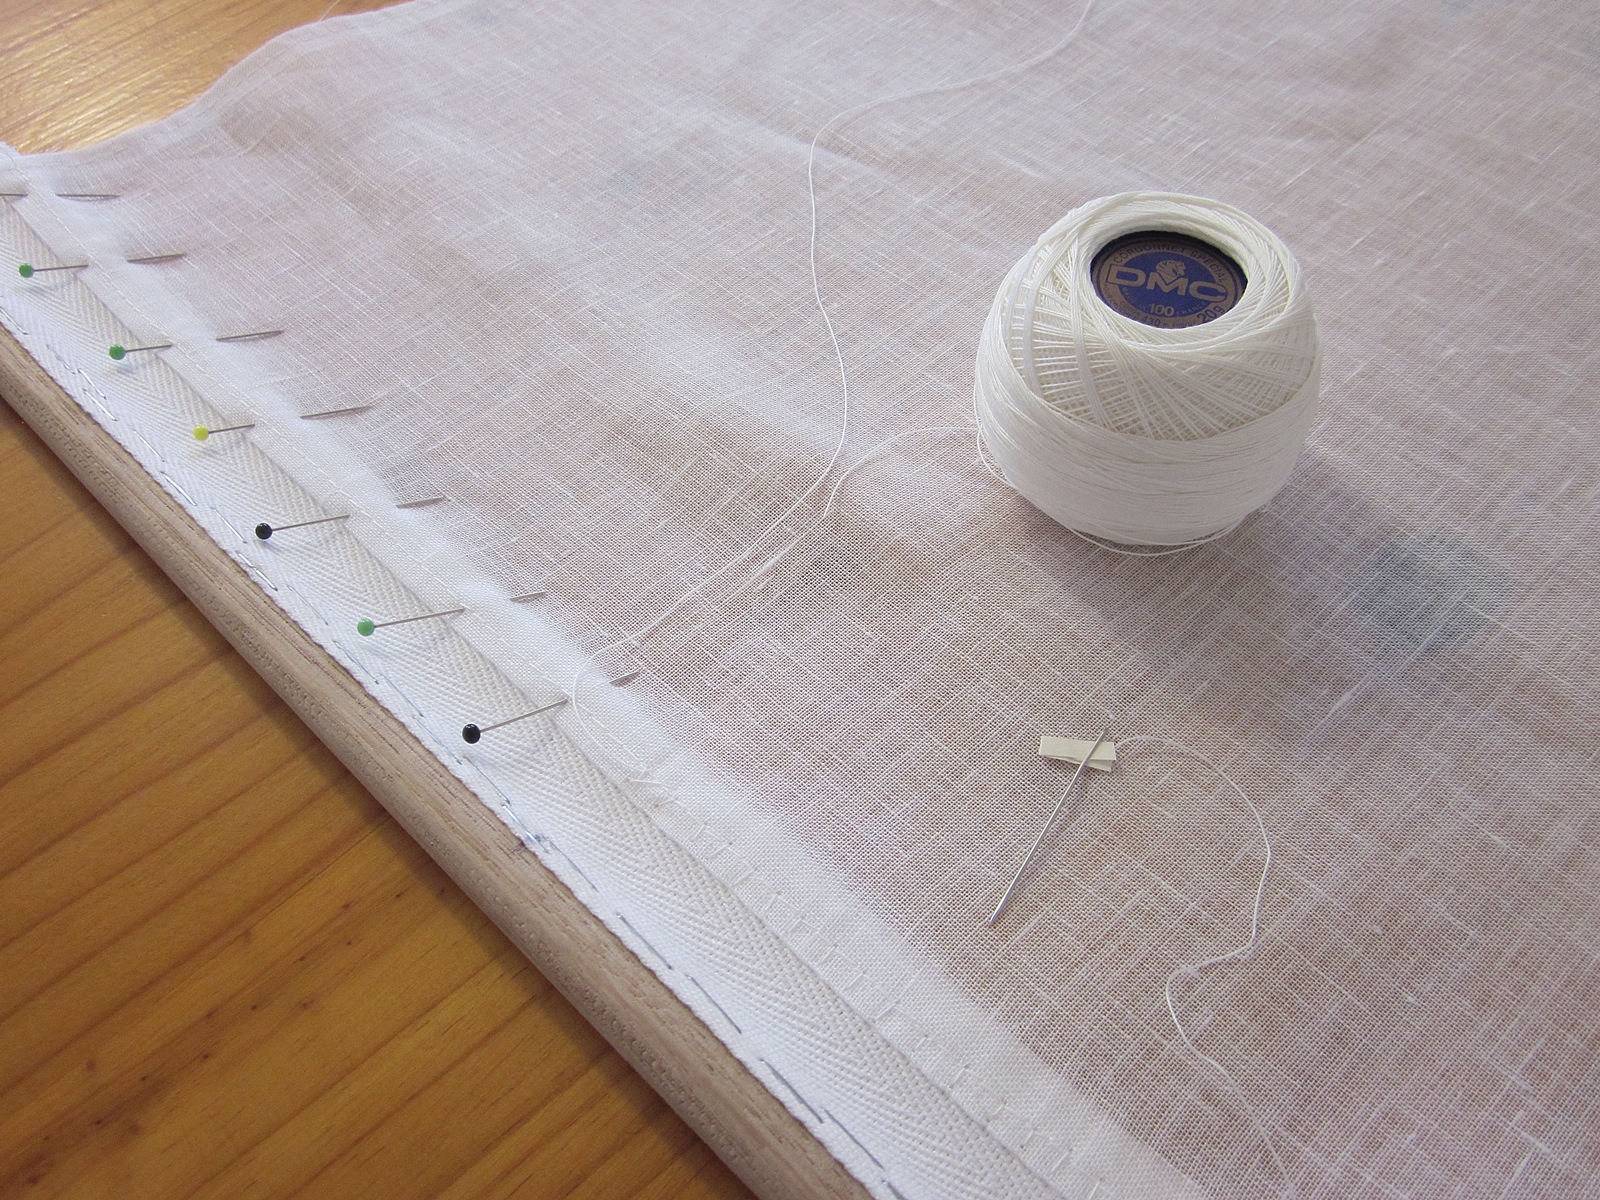
With plenty of pins to secure the linen in place, I stitched it to the cotton twill tape on the top roller bar, beginning in the centre and working outwards. Years ago someone gave me an unused ball of DMC Cordonnet 100. It's a nice strong thread for attaching the linen. I had to use a little slip of folded paper to coax the dense hard thread through the eye of my needle.


It was awkward stitching close to the wooden dowel and with the pins close by, so stab stitching was the best option. I found it interesting that the stitches are better worked at right angles to the dowel rod.


It's seldom that I use a thimble but this time my fingers soon got sore and out it came.


This is half way with the linen attached to the top and bottom rollers. I was able to roll up the excess linen and tighten the wing nuts to hold it really taut. So far so good.


Along the sides, I attached twill tape to the linen after I had rolled up the excess linen. This might not be the best way to do it, but if the thick tape was attached and then rolled up with the linen, I thought the layers of tape on the sides of the rollers might distort the fabric once it was under tension. It does mean that if  I need to unroll and work on that bit of linen, I'll have to re-attach the sides. For now that is in the distant future and by then I might have other plans for that small strip of linen.


I used Thread Heaven thread conditioner on the rough dry string so that it passed more easily through the tape. And the vicious-looking upholstery needle poked through the thick twill with ease. I was a bit skeptical about it. However, I soon became comfortable working with the long curved needle around the obstruction of the wooden sides of frame.

And here it is, all framed up. Setting up the linen in the scroll frame seemed like a lot of work, but once the string was tensioned, the linen was as tight as drum. There are no creases in sight, and it was well worth the time spent.


Working on the frame is on hold for now because I'm preparing to go to a family reunion in South Africa soon. I will take a couple of small embroidery projects with me. After all, what is a holiday without a little embroidery?

'Till next time, happy stitching! 

P.S. 30/01/2023 Jessica Grimm also has a video on dressing a slate frame here.

Monday, October 17, 2022

Nuts, Bolts, Dowel Sticks and the Laughing Cavalier

Linen is notorious for creasing. I want to do some pulled thread on a 50 count linen but this small, neatly folded piece proved even more difficult to press than usual, despite an eventual thorough drenching. If I wanted to avoid creasing the linen with a round embroidery frame, it seemed like I would have to exchange my usual small hoops for a larger, square frame. 

Years ago my father made me a scroll frame after I had seen one at the Knitting Bar in Benoni. The shop assistant recommended that I put my 'tapestry' of the Laughing Cavalier onto an embroidery frame and showed me one that had been set up in the shop. 

The Laughing Cavalier by Frans Hals, courtesy Wikipedia

My budget didn't stretch to a frame after totting up the pile of tapestry wool I needed. Instead, my dad listened to my description, dug around in his garage, and two days later I woke up to find, thanks to both my mom and my dad, my canvas mounted in a scroll frame, ready for stitching. All I have left of the frame are the wooden side bars. 

Two new dowel sticks, some twill tape and I thought I'd be ready to try out the new linen in my treasured old scroll frame. It wasn't quite so straightforward. The original dowel sticks had been used for something else and were missing so I had no sample of the correct size. And the nuts and bolts on the side bars were solidly corroded in place. 

The local hardware store helped find suitable bolts and matching wing nuts. The dowel sticks were however either too big or too small. After much thought and consulting the trade catalogues, the conclusion was that the original ones might have been Imperial rather than metric sizes. We finally settled on a larger dowel. 

I plan to work some samples of pulled work and want to mount the whole piece of linen.  Much measuring and discussion later, my husband cut two lengths from the dowel stick long enough to accommodate the width of the linen. After sanding them they slipped snugly into the side bars. 

The next step was to attach cotton twill tape to the dowels. First idea was to use a hammer and small nails. But we couldn't bury the nail heads deeply enough. Thanks to google, my husband found a staple gun that looked like it would do the job. And it did.


It was easy to tap the staples well into the twill tape so they couldn't snag on the linen. Now I can mount my lovely fabric.

The experiment to resurrect my old scroll frame took longer than I expected, but I'm very pleased with the result. My dad would have been delighted with it.

'Till next time, happy stitching.

Tuesday, September 27, 2022

The Birds and an Experiment

These have been in my sewing cupboard for a very long time. If you remember the Knitting Bar in Benoni, now long gone, you may have seen something similar in their window. They were not only a wonderful knitting shop but also sold embroidery supplies. I want to see whether I can use them again.

On another note, spring seems to arrived quite suddenly and we have been sitting out on the patio watching the rainbow lorikeets zoom past. Then there are the kookaburras with their amusing laughing call who are swooped mercilessly by the noisy miners, an extremely territorial bird. This little kookaburra sat cheekily eyeing the fish in the fish tank - until the noisy miners spotted it and chased it off.

Lately the galahs with their bright neon pink chests are back, waddling around hilariously in the park. It's interesting to see how carefully they choose which grass seeds to eat.  

Spring is also the start of the rainy season here and we have had our first lovely rain. The lorikeets are far too quick to photograph, but before the storm there were about fifteen fussing and squawking  in the big trees and then racing off across the park. 

Brisbane has had an unusually cold winter and the lovely warm weather is very welcome, not only for  for the birds, but for me as well. 

'Till next time, happy stitching.

Monday, September 5, 2022

Oblong Pulled Thread Pincushion

This little pulled thread embroidery sample became my first oblong pincushion. With no fixed plan in mind, the pincushion grew from this small design as I went along.

I damp stretched the embroidered flower sprig before deciding what to do with it. Most of my pincushions are square. This time I wanted to try something different.

The embroidery seemed a little plain on its own. Perhaps it needed some lace on either side to soften it? Cotton lace looked too heavy, so I went with a lighter synthetic lace instead. I would normally stick to all natural fibres, but the synthetic lace gave the delicate effect I was looking for. Backstitch over two linen threads secured the lace to the embroidery.

I had to iron the linen very carefully after I added the lace. With the high heat that linen requires, the lace would have shriveled up under a too hot iron. Once the lace was stitched in position, I withdrew a thread, four threads away from the backstitched lines.

Hemstitch would open up the gap left by the withdrawn thread a little further and give the lace an 'anchor'. The first row of hemstitch is on the left in the photo below. It needed more than this.

I finally settled on a row of hemstitch on both sides of the withdrawn threads. The hemstitched rows finished off and balanced out the design, 


When developing a new pattern, I sometimes stitch a number of samples to adjust the design, or test out stitches, tension or finishing ideas.  An oblong pincushion was the my initial idea for the flower sprig design, but I eventually chose to stay with a square pincushion shape. Instead of adding lace as I did for the oblong pincushion, I chose four-sided stitch to border the central motif.

Visitors to my Etsy shop Lynlubell may recognize the Flower Sprig pincushion which is available in the shop as a digital pincushion pattern. Click here to visit the shop and view the pattern.

Till next time, happy stitching!

Thursday, August 18, 2022

Threading a needle

Threading a needle with a fuzzy thread can be a challenge, especially for children. Make it easy by using a little piece of paper. Fold the thread inside, and push the paper and thread through the eye. Put the folded edge through first. 


It's a useful trick for using with many threads that are difficult to get through the eye of the needle. The response of my grandchildren and their cousins when they tried this was "Why didn't I know this before?" 

For more tips for threading a needle, click here to see them on the Kreinik blog.

'Till next time, happy stitching!

Wednesday, August 3, 2022

Button Festival

September 2023 Update

It's that time of year again at the Embroiderers' Guild Queensland. 

The Button Festival this year is on Saturday 2 September, 2023.

________________________________


The Embroiderers' Guild of Queensland are having a ButtonFest  on Saturday 3 September. 


The Festival is the result of many of the members destashing during Covid lockdowns and donating a total of almost three big buckets of buttons to the Guild. The buttons were sorted, and the special ones carded, all ready for you to browse or pick up a few bargains.

Come along to the Guild headquarters in Brisbane and join in the fun of the button festival on the first Saturday in September.

Sunday, July 31, 2022

World Embroidery Day

It was World Embroidery Day yesterday and I sat and stitched with some of the friendly embroiderers at the Embroiderers' Guild Queensland in Brisbane. Almost everyone had disappeared into the kitchen for a delicious cream tea when I took this photo of the hall. 

 With a gift table laden with beautifully stitched gifts for sale, a number of tables with tempting second hand supplies and wonderful displays of embroidery, there was plenty to buy and admire. There was even a personalized version of one third of the Bayeaux tapestry. The next third is in progress! 

I took my Hardanger runner along and completed a few more Maltese crosses. In preparation, I'd cut the threads of a few Kloster blocks beforehand. It was then easy to pull the cut threads out and work the crosses without having to concentrate too much while chatting and catching up on what everyone else was stitching. 

I hope you were able to enjoy some time with your embroidery yesterday and perhaps also meet up and stitch with some friends.

'Till next time, take care of yourself and happy stitching!

Thursday, June 30, 2022

Hedebo and its History

There are two super articles on the history and development of Hedebo that I came across this week. My tea cozy, adapted from a Hetsie van Wyk design, is sadly still resting in the UFO box.

Lyn Warner, Lyn's Needlecase

Over on the blog Fils et aiguilles, Yolande has written a detailed post with plenty of photos of her sampler that illustrates the history of Hedebo. Each band of the sampler is identified by technique and the period when it became popular. Don't be put off by the foreign blog name, there is an English translation for each paragraph. Click here to visit the article. At the end of the post, Yolande suggests visiting Clare de Pourtales' blog for more about Hedebo. 

Clare has written a fascinating blog post. She notes that stemming from an exhibition in 1879, Hedebo was declared a "National Treasure". How wonderful to recognize way back then the importance of preserving this beautiful style of embroidery! Clare's post includes photos from the Greve Museum in Denmark. You will find the article on her website Le Temps de Broder by clicking here. The article is written in English.

For some insight into the actual mechanics of the embroidery, the Greve Museum has a number of short videos on the various Hedebo techniques. To see them, click on this link for the museum and navigate to 'How to Sew'. You can opt for text in English, but vocals are in Danish.

If you are looking for inspiration, there are beautiful photos in the Japanese book Danish Whitework Hedebo that I wrote about in a previous post here.  

Have fun exploring and happy stitching!

Monday, June 13, 2022

Winter embroidery

Winter arrived early and dramatically in southeast Australia. We've had some of the lowest June temperatures in a hundred years! With this very cold weather and more time spent indoors it seemed a good time to go through my UFO's*. 

First out the box was this Hedebo tea cozy. I adapted the design from one featured in the book 'Embroider Now' by the late Hetsie van Wyk, a well known South African embroiderer. Click here for more about Hetsie's work in one of my earlier blog posts. 

Second out my UFO box was a Hardanger coffee table runner. I had thought of unpicking one side because the runner is rather long. But, I am going to complete it just as it is. The original design appeared in a Burda magazine Special on Hardanger and you can see more about the embroidery in this blog post here.

We have my daughter and family staying with us while they demolish and rebuild their house. I needed something fairly easy to stitch, so I have been working on the runner. All the kloster blocks are already finished and once I've cut the threads for the next few Maltese crosses, it requires little concentration and no counting. 

My Hetsie tea cozy? I still need to work out how to put it all together. I hardly use a teapot anymore so it may not end up being a tea cozy. For now it's safely back in the UFO box with it's fellow UFO's.

'Till next time, happy stitching. 

And if you are in the southern hemisphere, I hope the weather is a little warmer where you are.

- - - - - - 

*UFO - Unfinished Object

Thursday, May 19, 2022

Binding Embroidery Frames

Over the years I've gathered a few small embroidery frames, either from the Embroidery Guild's second hand sales table, or they've been passed on to me by friends. They're useful for when I have a couple of small projects on the go at the same time, or for teaching.

Instead of using a conventional rectangular photo frame, I've also used some to frame small pieces of embroidery, like this little pulled thread sampler. (The pattern is available in my shop Lynlubell on Etsy.)

Crazy Patch Pulled Thread Samper 

And like the shadow work piece I stitched in a class with Tricia Elvin-Jensen.

Design by Tricia Elvin-Jensen

Before using an embroidery frame, I bind the inner hoop with cotton tape. The binding helps grip the fabric and keep it taut in the frame. With time however, the natural oils on the hands rub off onto the tape, and it needs to be replaced. In the exceptionally clammy weather we're having, the tape on some of my well used frames feels almost sticky. It's time for it to come off.

I haven't yet found a local source of good quality white cotton tape. So, I'm unwinding the tape on two frames. I'll take if off, wash it and reuse it if I can. 

I do have some loosely woven cotton tape that I could use but I prefer the smooth close weave of this old tape. For now I need just enough for binding a 6" frame. There should be ample for that.

'Till next time, happy stitching!


Wednesday, May 11, 2022

Come Closer

The weather has turned dull dark and wet, and I had to venture out to a routine medical appointment that I wasn't looking forward to. I spotted this stunning display at the entrance to the building and despite the gloom, my day turned sunny. 

I just had to stop for a closer look. My curiosity was piqued. No, my eyes were not deceiving me. Those clusters of bright pink and red were all part of the same plant. The vivid colours of the pink bracts behind the red flowers put on a stunning show. 

I rather like the rich green leaves and the almost black stems of the flowers too. 

With the help of Google Lens, I found that it's a Clerodendrum x speciosum, also known as a Bleeding Heart Vine. A couple of our plants in the garden are looking straggly and need to be replaced so I'm going to look out for this Bleeding Heart Vine on my next visit to the garden shop. It's a beautiful plant and apparently it's easy to grow. Perfect for our garden. Meanwhile, I hope that we avoid the extremely heavy rain that is causing flooding all around us again. 

'Till next time happy stitching!


Tuesday, April 26, 2022

Pricked Card and Sticky Tape

 How do you finish off the threads on the back of a pricked card?

Sticky tape! Eek! 

I was very reluctant to use it at first but, yes, sticky tape and stitching do go together. There's no other sensible way that I could think of to anchor the threads. I am still a bit skeptical of using tape and I probably use more than is necessary. It does work well though. 

Sticky tape and an untidy back are why I use a three fold card. 


It is necessary to cover up the back. The extra flap can be neatly stuck down with either double sided tape or with a little paper glue.


The pattern called for tiny sequins for the eyes that I didn't have. I think the straight stitches will do.

'Till next time, happy stitching!


Friday, April 15, 2022

Pricked Card Embroidery and a Bumpy Ride

I started stitching a pricked card. It's a nice little project to pick up and do when you have a few minutes to concentrate on stitching. I bought the pattern from Prick 'n Stitch in Pinelands, Cape Town a few years ago. 

My granddaughter did some of the pricking for me. It was during the severe floods we had in Brisbane a few weeks ago and the days were very dull and dreary. I've adjusted the photos to compensate for the very poor light, but the photos that included the pricking tool she used were too dark to use, despite trying to fix them. The intensity of the rain over the three worst days was scary. I couldn't believe just how much rain kept falling from the sky. Thankfully we had only very minor flood damage. I was struck by how blissfully quiet is suddenly was when the rain eventually settled into a more gentle tempo.

I chose a thread which has a glint of reddish gold in it. It adds flashes of light to the dark brown of the cat's fur. The thread is a metallic Supertwist by Madeira. It was a parting gift from my friend Sandi Turner who now lives near Oxford in the UK. 


A one-eared cat is as far as I got before life became a little hectic. 

It all began when a much anticipated visit from my daughter and family who live overseas didn't quite work out. Her Australian visitor visa arrived too late - due to staff Covid delays at the visa office. Then there was also a last minute problem with a missing residence visa in a new passport. In the end only half the family made it onto the plane to see us. To add to the upset their luggage didn't arrive at all and couldn't be traced for days. It was however good to see my grandson and my son-in-law and spend some time with them. We even had a very refreshing trip into the country with the cousins meeting up and having fun together. Such a joy to see. Hopefully we'll see the whole family here for Christmas. It will be the first time in three years. 

On the last day of their visit, my daughter who lives nearby took ill. She spent almost a week in hospital and finally had to have surgery to remove her tonsils and a complicating abscess. She is now recuperating with Rod and I for a few days and due to the seriousness of the surgery has been booked off of work for another two weeks.  

Finally, this week we were all especially sad to learn that my lovely step-mom had passed away. We've been going through photos and reminiscing about the good times we spent with her. Her cheerful, loving presence will be greatly missed. 

It's strange how life goes along fairly smoothly and predictably and then all of sudden it doesn't. After some bumps in the road, I hope our family is now in for a smoother ride.

'Till next time, happy stitching!