Showing posts with label Hedebo. Show all posts

Thursday, June 30, 2022

Hedebo and its History

There are two super articles on the history and development of Hedebo that I came across this week. My tea cozy, adapted from a Hetsie van Wyk design, is sadly still resting in the UFO box.

Lyn Warner, Lyn's Needlecase

Over on the blog Fils et aiguilles, Yolande has written a detailed post with plenty of photos of her sampler that illustrates the history of Hedebo. Each band of the sampler is identified by technique and the period when it became popular. Don't be put off by the foreign blog name, there is an English translation for each paragraph. Click here to visit the article. At the end of the post, Yolande suggests visiting Clare de Pourtales' blog for more about Hedebo. 

Clare has written a fascinating blog post. She notes that stemming from an exhibition in 1879, Hedebo was declared a "National Treasure". How wonderful to recognize way back then the importance of preserving this beautiful style of embroidery! Clare's post includes photos from the Greve Museum in Denmark. You will find the article on her website Le Temps de Broder by clicking here. The article is written in English.

For some insight into the actual mechanics of the embroidery, the Greve Museum has a number of short videos on the various Hedebo techniques. To see them, click on this link for the museum and navigate to 'How to Sew'. You can opt for text in English, but vocals are in Danish.

If you are looking for inspiration, there are beautiful photos in the Japanese book Danish Whitework Hedebo that I wrote about in a previous post here.  

Have fun exploring and happy stitching!

Monday, June 13, 2022

Winter embroidery

Winter arrived early and dramatically in southeast Australia. We've had some of the lowest June temperatures in a hundred years! With this very cold weather and more time spent indoors it seemed a good time to go through my UFO's*. 

First out the box was this Hedebo tea cozy. I adapted the design from one featured in the book 'Embroider Now' by the late Hetsie van Wyk, a well known South African embroiderer. Click here for more about Hetsie's work in one of my earlier blog posts. 

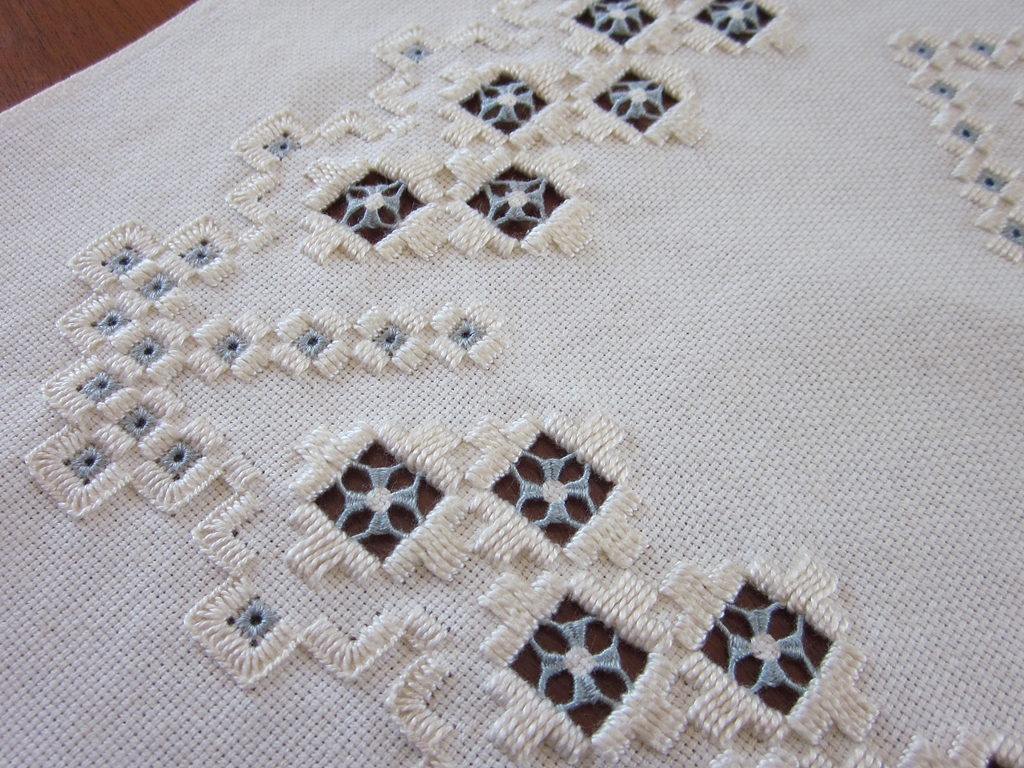
Second out my UFO box was a Hardanger coffee table runner. I had thought of unpicking one side because the runner is rather long. But, I am going to complete it just as it is. The original design appeared in a Burda magazine Special on Hardanger and you can see more about the embroidery in this blog post here.

We have my daughter and family staying with us while they demolish and rebuild their house. I needed something fairly easy to stitch, so I have been working on the runner. All the kloster blocks are already finished and once I've cut the threads for the next few Maltese crosses, it requires little concentration and no counting. 

My Hetsie tea cozy? I still need to work out how to put it all together. I hardly use a teapot anymore so it may not end up being a tea cozy. For now it's safely back in the UFO box with it's fellow UFO's.

'Till next time, happy stitching. 

And if you are in the southern hemisphere, I hope the weather is a little warmer where you are.

- - - - - - 

*UFO - Unfinished Object

Wednesday, September 2, 2015

A Little Progress and How to Centre a Design

I have made a little progress on my Hedebo piece. The weaving in the drawn thread areas has been done and there are photos on my camera. Unfortunately the photos are not yet on my new PC. I am still finding my way around Windows 10 and getting things set up the way I want them. I hope to download all my camera software soon and then I will be able to post some more photos here on my blog. 

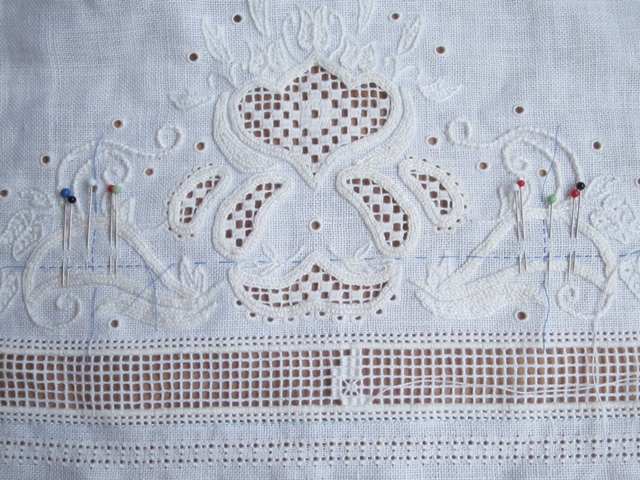
In the meantime I can show you the one photo that I do have on my PC of how I marked out the drawn thread areas with pins in order to centre the woven designs in the two leaf shapes. 


Oh, and the little woven motif at the bottom? It was unpicked 5 times before I got it where it was supposed to be! In this photo it's still one square too far to the right.

I hope to show you more photos of the Hedebo progress soon when I should also be able to show you a few photos of the lovely outing I had on Saturday with the Cape Embroiderers' Guild to visit the studio of one of our members.

It's always interesting to learn how other embroiderers approach the small challenges we face in our stitching. If you have any helpful little techniques you would like to share, please either leave a comment below or email me at lynette[dot]warner[at]gmail[dot]com. I'd love to hear from you.

'Till next time, happy stitching!

Wednesday, August 5, 2015

Hedebo resource

If you are interested in trying some Hedebo embroidery and want a good starting point try visiting the Greve Museum's Hedebo site Hedebosyning here.  Although it is in Danish you can click on the right side of the landing page for the English version.

There is also a free pdf tutorial to follow here. Unfortunately the instructions for the tutorial are in Danish but the stitch diagrams are clear and fairly easy to follow. I'd love to hear from you if you do give it a try. Just leave a comment below.

My computer has been to the 'doctor' again but it is still not fixed. Its unreliable now as it freezes 5 or 6 times a day. Looks like it's on its last legs. I have been putting off making the decision that it is actually quite old and needs replacing. The thought of new software and moving everything over is daunting.

In the meantime, I can borrow a machine to keep in touch and I'll post a longer piece when I can access my files and photos again.

Till then, happy stitching!

Saturday, June 6, 2015

Hedebo Tea Cosy - Drawn Thread

I haven't done a lot of stitching recently, but I have made a little progress on my Hedebo tea cosy. The surface embroidery has been completed and the drawn thread work is well underway. You can read more about this project in previous blog posts here and here.


Below you can see that the pretty little pulled work border around the sides is complete and I have started cutting threads and filling in the openwork areas. I started with the small less important areas, leaving the central motif until I had had a bit of practice.


Each openwork or drawn thread area is outlined by the two rows of chain stitch so characteristic of Hedebo embroidery.


In these drawn thread areas, I cut 2 threads and skipped 2 threads in both directions. I strengthened the grid with ordinary sewing machine cotton because I wanted the whipping and the underlying grid to be unobtrusive.

For the large rectangular area of drawn thread work at the bottom I carefully counted and tacked over every 2 threads to mark the threads I wanted to cut. Its's a big area and I didn't want to miscount somewhere and have to fix up any threads cut by mistake. Why the blue and red tacking?


I started with the pale blue thread but that didn't show up too well, especially at night. The bright red was much easier to see. I won't leave it in the embroidery for too long in case there is a transfer of it's strong red colour to the linen.

Also, when I changed to the red thread, I began at the side by going under the first two threads to be cut, as you can see above. The plan was to slip the point of the scissors under each pair of threads where the red thread lay underneath. Anything to make the cutting easier and more foolproof!


I have eased out the cut threads one by one and trimmed them off close to the satin stitch border. Next I'll strengthen the grid as before by whipping over the grid intersections with machine sewing thread. Finally I'll weave in the decorative filling.

The end of this piece of embroidery is in sight. It will be good to finish it but I still have to decide if it is actually going to be a tea cosy or if it's eventually going to be something else.

---------------

On a different note, I am back from a long anticipated reunion of Rod's family. It's been a few years since the four siblings and their spouses were all together. We met up in Sedgefield on the beautiful Garden Route and spent a very happy time taking long beach walks, having fabulous home cooked meals, and catching up and sharing fond memories. With the family scattered all over the country, and the globe, getting together is difficult but we all left Sedgefield with the firm intention of having another reunion before too many years have passed.

Winter arrived surreptitiously while we were away and being back home in Cape Town has been a bit of a shock weather-wise. Temperatures have dropped and the first big, but very welcome, rains have fallen. Perhaps with the cold weather here it's time to stay indoors, keep warm and take out the embroidery.

Till next time, happy stitching!

Monday, April 27, 2015

Hedebo Tea Cosy and an Inspirational Motto

I have done a little more embroidery on my Hedebo tea cosy which I wrote about some time ago. This UFO (unfinished object) was started in 2006! I often wonder why some projects languish in the UFO or 'to do' box while others are completed fairly quickly.

Hedebo tea cosy based on a design by Hetsie van Wyk 
One of the things that bothers me about this Hedebo project is that I used perle threads for the surface embroidery and it has not given me the results I had envisioned. At the time perle or stranded DMC embroidery thread was all I could get. With internet shopping opening up the variety of threads available, I think I would now perhaps choose a cotton floche thread which is softer looking than the perle I used.

I have come across this inspirational quote a number of times recently and it prompted me to take action. After all perfection can be an enemy of progress. Can't it?

Photo: Offizin on Etsy
My tea cosy may not match up to my original mental picture of it but I really like the design and with my new motto 'done is better than perfect' I'm carrying on with the stitching. I can also practice techniques that I don't use often or haven't tried before - like the eyelets I was putting off doing.


The eyelets were made without cutting any threads and the 'special tool' I used to keep the openings all same size was a 2.75mm knitting needle. With a stiletto, awl or laying tool you have to judge how much to open up each hole, something I have found tricky. The knitting needle worked well for me and I like how you can get the same size hole each time - well almost.


The next step is to finish off the pulled work around the sides and around the border at the bottom. Then I can start cutting and withdrawing the threads for the drawn thread areas. Those are the bits I have been wanting to get to for a long, long time.


Friday, July 18, 2014

Hedebo

Hedebo embroidery originated in Denmark. It is an openwork embroidery worked on white.

Hedebo embroidery - from Encyclopaedia of Needlework by T de Dillmont
There are various different styles of Hedebo from the geometric shown above to softer more natural shapes in the doily below. Many embroidery techniques are incorporated including drawn thread work, Reticella, cutwork and needlelace.

Hedebo - from Embroider Now by Hetsie van Wyk
There are a number of exquisite examples over on Needleprint like these.


They are from a Japanese book titled Danish Whitework Hedebo and you can see more photographs taken from the book here on the Needleprint blog.


Tuesday, April 9, 2013

Textile Museum

Jubilee House in Dorp Street, Stellenbosch houses a collection of beautiful embroidery and lace. The building, originally the annex of a hotel next door, is now a National Monument and the headquarters of the Cape Women's Agricultural Association. If you are particularly interested in whitework or know of Hetsie van Wyk's rich and beautifully executed embroidery and would like to see some of it, then this is a little treasure of a museum to visit when you are in or around Cape Town.

The museum is open Monday to Friday 9-12am, with a small entry fee. It has few visitors so if you find the doors locked, like Gill and I did this morning, just knock or ring and the secretary will open up for you.


On the way upstairs a stop in at the committee room revealed a tablecloth made of 18 separate embroidered squares, joined with lace insets, and each one a different design and technique. The photos are unclear but they do give some idea of the amount of work in the cloth.


Then we noticed a Hardanger cloth in use on a trolley with large (did I say large?) openwork areas. The beauty lay in the evenness of the tension.


One room is dedicated to embroidery with 30 examples of Hetsie van Wyk's work in the glass cabinets. This was what I had come to see. You should have seen Gill and I on our hands and knees examining some of those treasures on the bottom shelf!

 I just loved these two christening gowns.


The christening gown on the left is Carrickmacross, the technique similar to the embroidered lace on Kate Middleton's wedding dress when she married Prince William. And the one on the right is delicate shadow work. The lace was also made by Hetsie, some of which is hidden underneath on the petticoats! Here is a closer look at the Carickmacross gown:


Carrickmacross embroidery detail - the flowers are appliqued and then fine patterns are darned into the net. The picots on the edge are known as 'twirls' and the eyelets are 'pops'
This is the shadow work gown with a glimpse of the lace on the petticoat showing through the fine fabric:


This post is growing rather long. I'll put up more photos in the next one. Till then, happy stitching!