Friday, May 24, 2013

South Peninsula Handcraft Club Exhibition

The South Peninsula Handcraft Club Exhibition is on until Saturday 25 May. The work is beautifully set out and there is lots to see - quilts, embroidery, soft toys, beading and more. Its well worth going down to the Civic Centre in Fish Hoek to see the display.


The backdrop on the stage where the toys are was specially painted for the exhibition and gives a really festive air.


The Christmas corner is charming.
 
 
And do count the mice and drop your entry in Santa's postbox. Something that I forgot to do in all the excitement!
 
 
There is all sorts of embroidery to see. I could have spent ages here admiring the fine work- pulled work, drawn thread, hardanger, ribbon embroidery, cross stitch and more.


As you walk in you can't miss the cheerful collection of shopping bags up on either side of the stage. Why shopping bags? Club members were each given a shopping bag and challenged to decorate it.
 
 
This is just a small sprinkling of what there is to see, but it does give some idea of the variety of crafts on show. If you can't get to Fish Hoek to see the show you can find the SPHC Club on Facebook. Click on the photo link on their page and you will find some of the individual items that are on the exhibition as well as photos of previous exhibitions.


Monday, May 20, 2013

Orange tree

After four years my little orange tree has produced a good crop of oranges.


Now to pick them and make the marmalade...


Saturday, May 18, 2013

Australian Cross Stitch and Chicken Scratch - Gingham embroidery

Australian Cross Stitch is just the thing to do when you want something that stitches up quickly and easily. The end result is always pretty and it looks like lace. Here I used a mercerised cotton crochet thread size 8 which gives a nice crisp look to the embroidery.

Australian Cross Stitch

Looking at these two pincushions someone asked whether it was Chicken Scratch. No it's not. It's Australian Cross Stitch. One design is embroidered with half cross stitches and decorated with circles. The other design is cross stitch with flowers and a decorative border stitch.


Chicken Scratch, which also goes by the names Snowflaking, Hoover Lace or Depression Lace, is also done on gingham but the difference is in the stitches. To illustrate here is a Chicken Scratch pincushion embroidered on the same gingham.

Chicken Scratch

How to tell the difference between Australian Cross Stitch and Chicken Scratch?  The quick giveaway between the two is that Australian Cross Stitch has either crosses or half crosses, but Chicken Scratch usually has a double cross stitch and a running stitch. Also, Chicken Scratch often has an outline of double cross stitch worked in a coloured thread. This outline is done in the same colour as the darkest squares of the gingham.

Chicken Scratch

I am teaching an Australian Cross Stitch class this month and hope to have some of the patterns in my Etsy shop soon. In the meantime, happy stitching!

Monday, May 13, 2013

Embroidered Wedding Veil

Every so often I go through my cupboards to clear out things that are taking up more space than they are now worth. I don't usually get to throwing much out because somehow everything has some special meaning even though it may no longer be useful, but I do turn up treasures that I haven't seen for a while. One of these treasures is my daughter's wedding veil.


Cindy had decided to remodel and wear my 1970's wedding dress. It had a pretty train of a machine embroidered fabric.


If anyone knows the name of this transparent and crinkled fabric please let me know. With time this piece of information has vanished from my memory.

I had always wanted to embroider a veil. With lots of encouragement as well as valuable insights and tips from teacher and friend Tricia Elvin-Jensen I set off on the project. Using the embroidery on the train as a starting point, I drew a matching motif. The veil was to be circular and would have 16 of these motifs around the scalloped edge.


Luckily I still had a few flowers left over from the trimming on my original train. I unpicked the rather heavy looking double layered flower and used only a single layer of the flower to attach to the veil. This was the focal point of the embroidered motif.

 
To give the flower more depth I first embroidered it's outline on the net and then attached the motif. A few small beads from Montana where Cindy was staying trimmed the centre of each flower.
 

Then needle running and lots of eyelets...

 
This is the only photo we have of the back of the dress which shows the train and veil.


Such happy memories!


... and now both dress and veil are safely back in my cupboard.

Friday, May 3, 2013

Cupboards and stitched treasures

In between stitching I have been going through some cupboards and trying to clear out and make some space.

The stitching has been fun. I have been asked to submit a teaching project for possible inclusion in an embroidery convention in August next year. What a surprise that was! The convention is known as Ighali (meaning Threads) and will take place in Port Elizabeth. For the event I am working on a piece of Dresden Lace, or pulled worked on very fine fabric, something that I really enjoy. But more about that in a future post.

Clearing out the cupboards was not fun - until I found my daughter's wedding veil. Then it was a trip down memory lane because she remodelled and updated my wedding dress and train for her wedding. Also, I had always wanted to embroider a wedding veil and that was the perfect time to do it.

When the sun shines again here in Cape town I will take some photos of the train and the veil and put them up on my blog for you to see.

Till then, happy stitching!

Wednesday, April 24, 2013

More whitework embroidery

In my last post there were photos of some of the exquisite embroidery on display at the Jubilee House Textile Museum in Stellenbosch, just outside of Cape Town. Here are a few more photos of the whitework embroidery on show there. The work is in cabinets behind glass making it difficult to photograph, but I hope you will enjoy seeing what I managed to capture.

 
The tea cosy designed and stitched by Hetsie van Wyk was worked on pink linen which showed up the stitching beautifully. Don't you just love those two dainty little triangular areas across the centre?


 And look at those eyelets on this richly embroidered cutwork cloth!

 
Another of Hetsie's embroidered works, this one in a shimmering silk thread and combining surface embroidery and a variety of openwork techniques:


There was so much to admire that I will have to pay the museum another visit one day. I didn't get a chance to look closely at the collection of Emily Hobhouse's lace though I did notice a couple of pieces of very fine needlepoint lace - well worth going back to see.

Tuesday, April 9, 2013

Textile Museum

Jubilee House in Dorp Street, Stellenbosch houses a collection of beautiful embroidery and lace. The building, originally the annex of a hotel next door, is now a National Monument and the headquarters of the Cape Women's Agricultural Association. If you are particularly interested in whitework or know of Hetsie van Wyk's rich and beautifully executed embroidery and would like to see some of it, then this is a little treasure of a museum to visit when you are in or around Cape Town.

The museum is open Monday to Friday 9-12am, with a small entry fee. It has few visitors so if you find the doors locked, like Gill and I did this morning, just knock or ring and the secretary will open up for you.


On the way upstairs a stop in at the committee room revealed a tablecloth made of 18 separate embroidered squares, joined with lace insets, and each one a different design and technique. The photos are unclear but they do give some idea of the amount of work in the cloth.


Then we noticed a Hardanger cloth in use on a trolley with large (did I say large?) openwork areas. The beauty lay in the evenness of the tension.


One room is dedicated to embroidery with 30 examples of Hetsie van Wyk's work in the glass cabinets. This was what I had come to see. You should have seen Gill and I on our hands and knees examining some of those treasures on the bottom shelf!

 I just loved these two christening gowns.


The christening gown on the left is Carrickmacross, the technique similar to the embroidered lace on Kate Middleton's wedding dress when she married Prince William. And the one on the right is delicate shadow work. The lace was also made by Hetsie, some of which is hidden underneath on the petticoats! Here is a closer look at the Carickmacross gown:


Carrickmacross embroidery detail - the flowers are appliqued and then fine patterns are darned into the net. The picots on the edge are known as 'twirls' and the eyelets are 'pops'
This is the shadow work gown with a glimpse of the lace on the petticoat showing through the fine fabric:


This post is growing rather long. I'll put up more photos in the next one. Till then, happy stitching!


Wednesday, March 27, 2013

Free pattern - Sew a Girl's Bag

Sew up a little shoulder bag in an afternoon from scraps of cotton fabric from your stash. Its simple to make and just right for holding a little Easter surprise. The finished bag is approximately 14cm x 16cm.


Materials:
20 cm bag fabric (115cm wide)
20 cm lining fabric
Batting or interlining 16cm x 36 cm
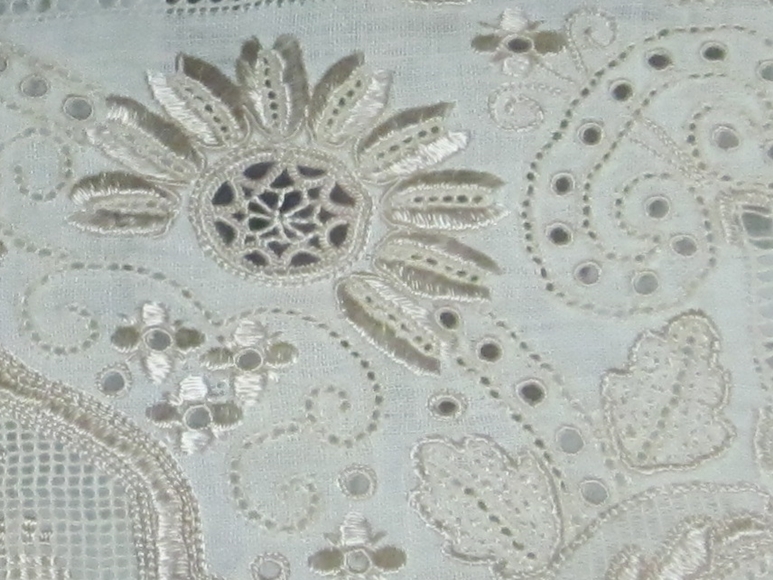
15cm Flower trim or lace.


Cut:
1.Bag fabric:
Outer bag 16cm x 36cm
2 straps 5cm x 50cm
Pocket 10cm x 18cm


2. Lining:
Bag lining 16cm x 36cm
2 Straps 5cm x 50cm


3. Batting: 16cm x 36cm


To make up:
Seam allowances are 1cm.

1. Fold pocket piece in half and sew along two opposite sides. (Open side is on the left here.)

2. Turn through to the right side and press. Pin pocket to lining with the raw edge about 12cm from top of end of lining (shown on the left below). Stitch as pinned.


3. Flip the pocket over towards top of lining (left). Top of pocket is about 6cm from edge. Stitch 3 sides of pocket, keeping the top open.


4. Pin flower trim 6cm from top of bag fabric and stitch in place.
 Optional: To highlight the trim, lay the batting under the bag fabric and pin. Sew one line of stitching above the flower trim, and one line of stitching below, through the two layers.


5. Place the lining down with pocket underneath. Lay the batting on top. Finally lay the bag fabric on top with flower trim facing upwards. Pin the 3 layers carefully together.
 
6. Fold the bag in half with right sides facing. Pin. Stitch along the two sides. Neaten the edges.
 
7. Turn the bag to the right side. Neaten around the top open edge of the bag. Fold down 2cm and stitch in place.
 
8. Make the straps: (If you prefer narrower straps, trim 1cm off one long side of each strap and lining piece.) Place the lining on top of a bag strap. Sew down the long side, across the short side and up the other long side. Leave one short end open for turning. Turn through using a large blunt knitting needle (or dowel stick). Gently feed the closed end onto the needle first, turning the fabric in as you go.
 

Pull the fabric through to the right side. Press. Neaten off the open end of the straps.

9. Pin the straps to the bags, tucking in about 2cm. Adjust the strap length if necessary. Stitch in place.


Enjoy sewing up the bag from this free tutorial and have a Happy Easter!