Thursday, March 23, 2023

Barberton Daisy Needlecase

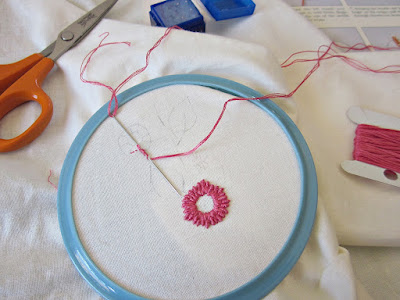
Here's the sprig of flowers I embroidered as part of the guild's stitch along, and which I wrote about in this blog post here

I finished it into a needle book with two felt pages.

I used a DMC pearl thread # 8 to outline the spray of flowers with Holbein stitch. It happened to be the exact same colour as the pink thread of the petals. Both threads were passed on to me years apart and by different people. What a coincidence!

The lazy daisy bullion stitches of the petals look as though they could be the petals of Barberton daisies. Barberton daisies, also known as Gerbera jamesonii, and indigenous to Barberton in South Africa, were the first gerbera to be scientifically described (Wikipedia). 

Gerberas and chrysanthemums

I have fond memories of my uncle proudly growing 'Barbertons' along his new front garden wall - the wall my cousins and I secretly walked along while my uncle was at work. We only got found out when the youngest cousin who could barely yet walk, climbed up, tried to walk along the wall and fell off! That was the end of playing on the wall.

'Till next time, happy stitching!


Monday, March 20, 2023

Marble Lace

This is not exactly embroidery, but it does have extraordinary embroidery detail. The lace cravat and sleeve ruffle that are hewn out of solid marble are captivating. Then there's the wonderful detail on the fringe and the embroidered buttons.

Courtesy Wikipedia Commons

The sculptor was Louis Phillipe Mouchy. 

Sunday, March 12, 2023

Using Old Embroidery Thread

There's an informal stitch along (SAL) at the Embroiderers' Guild of Queensland on the first Saturday of the month. It takes place during the regular meeting and each month there's a different sprig of flowers to stitch, with expert guidance on the stitches. The SAL is led by Deborah Love and there's also a lovely friendly exchange of ideas and information among the members. 

I took along a box of well-used and much-treasured threads that had been passed on to me, knowing that I would need just a little bit of each colour for the first flower spray. I plan to make small articles  rather than a cushion or a large picture.

The SAL started off with lazy daisy bullion stitch. (Also called 'Bullion Knot - Detached Chain' or 'Bullion - Lazy Daisy'.) After a few less than successful attempts at bullion stitch in the past, I have studiously avoided it - despite the excellent tutelage of Lynne Laver of the Cape Embroiderers' Guild whom we fondly refer to as the Bullion Queen. But, it was time to tackle this tricky stitch again - with an added lazy daisy stitch.

Well, I struggled. The needle just wouldn't pull through the loops. I tried a smaller milliner's needle. I tried wrapping the thread a little looser around the needle. I tried giving the needle a slight twist when caught on the wraps. Nothing made a much of a difference. Eventually I began to blame the thread. After all, a bad workman always blames his tools, or in this case, the thread. It seemed unusable.

But, thread conditioner came to the rescue! I separated out my three strands, pulled each one over the surface of the thread conditioner, then I put them together and pulled for one more coating.  

Not only did the needle slide through the wraps more smoothly, but it was much easier to thread the needle too! The thread conditioner also ironed out some of the wrinkles in the thread making it less springy and easier to work with.

I would guess that the thread is very old. Natural fibres decompose over time especially in less than perfect conditions. Light, heat and moisture all play a part in the process. Perhaps some of the chemical bonds in this cotton have begun to deteriorate causing it to lose some of its smooth finish?

Although the Thread Heaven conditioner solved my problem, I would be wary of using this particular thread on a big important project. I still have a way to go for achieving really neat bullions, but I have made some progress. At least I have gotten over the mental block I had about doing them.

'Till next time, happy stitching!


Friday, February 24, 2023

Daisy Band Sampler Pincushion

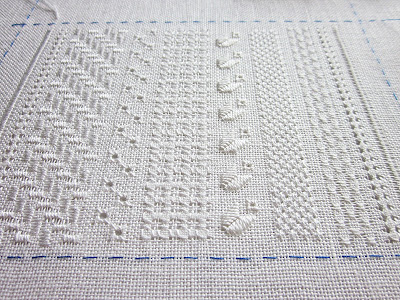
I've drawn up a pattern for the little pulled thread sampler I've been working on in the background and the pattern is now available in the Etsy shop. You can see more about it by clicking here.

The idea for the embroidery originally grew from trying out a piece of pulled thread embroidery without the benefit of an embroidery frame. You can read more about that in this blog post here. Although it was a novel experience and quite successful, I am more familiar with embroidering in a frame and since completing the sampler, I have reverted to using one. 

Originally, I wanted to see how different or difficult it was to work various stitches while holding the embroidery in my hand and I chose several popular pulled thread stitches for my test sampler. I also love doing a variety of different embroidery stitches. Any excuse to add another stitch! I can see why through the years samplers of all types have had an endless appeal to embroiderers. 

It's simply fun to use lots of different stitches and watch how each one turns out as you stitch it - without the distraction of a design. The stitches speak for themselves.

Once the stitching was done and it seemed like a nice little project to do, I started drawing up a pattern. But, there were quite a few delays. Besides Christmas and having family to stay, one was that the software I use suddenly had a glitch. That took quite a while to iron out. Another was that photos of the finished pincushion proved a challenge. The first few with my trusty point-and-shoot camera were disappointing, so Rod took some with his phone. 

They were much better than my first two attempts but the rich inky background turned out to be rather overwhelming. In the end, we had a bright day and I found a bright spot on the patio to take the photos. I settled on the white background I started out with and used those photos for the pattern.

The pattern has instructions and stitch diagrams for a collection of pulled thread stitches, worked in bands across the linen. There's also a pretty row of daisies in-between and the embroidery is finished off as a pincushion. It's a digital pattern and easy to download from the link that Etsy sends with your receipt.


Visit my shop Lynlubell on Etsy to browse all the patterns, or go directly to have a look at the Daisy Band Sampler pincushion pattern by clicking here.

Till next time, happy stitching!

Monday, January 30, 2023

Pastel Candies - Pretty on Point

With a selection of pretty pastels and no set plan in mind, I've been trying out a few ideas for a canvas work pincushion. Starting with pink and lavender blue, I soon settled on the centre. I remember seeing something similar in a small Good Housekeeping booklet some years ago. I like the unusual swirling effect when you turn it and look at it from an angle.

I tried out colours and stitches for the next rounds, and after stitching and unpicking some of them, I remembered to take this photograph. 


It's been a busy and happy few months with family around and I picked it up and put down with little progress. That is until last week. The pincushion is now almost finished and I'll post more once I've sorted through my photos.

I hope you have made a good stitching start to the year.
Till next time, happy stitching!


Wednesday, January 25, 2023

Ukrainian Embroidery

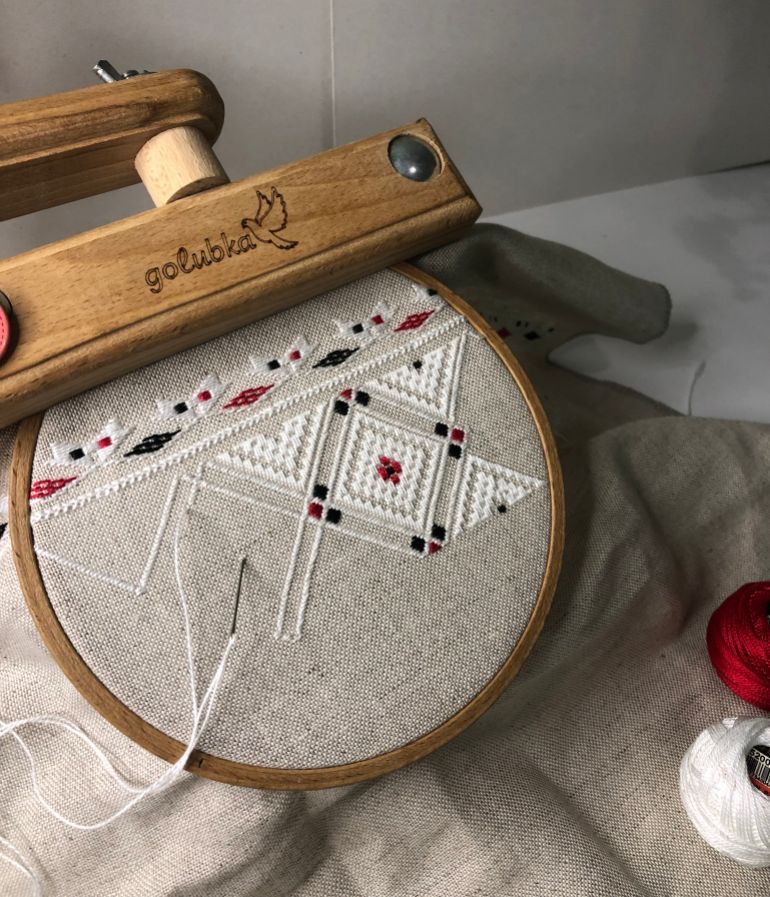
Embroidery in Ukraine has a rich history. It can be traced back over 2000 years and there are many styles and colours based on the different areas in the country while the motifs themselves are rich with symbolism. 

Marina, Katerina and Valeriya have been embroidering and selling vyshyvankas to raise funds for the Ukrainian war effort and to popularise the icon of Ukrainian culture [Pearly Jacob/Al Jazeera]

A group of embroiderers who fled Ukraine and who meet up in a coffee shop in Tbilisi, Georgia are keeping the embroidery of Ukraine alive in various ways. Some stitch brooches as well as vyshyvankas, a shirt embroidered with colourful motifs, and take various commissions.

Details of a century-old pattern from the region of Chernihiv on natural hemp cloth that 24-year-old Maryana Lyba is currently working on for a US-based client [Courtesy Maryana Lyba] Source: Aljazeera.com

Numerous other enterprises based on Ukraine's embroidery are continuing despite the difficult circumstances they find themselves in. Part of the funds raised go in some way towards the war effort. 

The original article can be read here on Aljazeera.com. I found it a fascinating read.

Sunday, January 1, 2023

Happy New Year

An email from the Royal School of Needlework popped into my inbox today displaying this interesting canvas work piece by Hakyung Choo.

Canvaswork by RSN Hampton Court Palace Certificate Student Hakyung Choo

It seemed perfectly timed to wish you a Happy New Year!

Friday, December 23, 2022

Almost Christmas

Two days to go to Christmas, the tree is decorated, and the grandchildren are full of anticipation and excitement. We had a hilarious game of charades, a firm favourite of all four children. I even performed such a convincing act that my son-in-law guessed immediately that the word I had to act out was 'popcorn'!

I hope you have a happy Christmas and peaceful holiday season. 'Till next time, happy stitching!

Tuesday, December 6, 2022

Delicious colours

I'm playing with these delicious pastels. Paternayan wool, also known as Paterna, is lovely for stitching on 14 count canvas. 

I found the soft ice-cream colours at the All Threads Embroidery shop in Brisbane. What a marvellous little shop it is for anything embroidery! It seems that I was fortunate to find any Paterna wool there at all. In future they will be stocking only Appletons crewel wool because of the continuing Paternayan supply issues. 

In my last post here, I was looking forward to a trip to South Africa to visit family. Well, things don't always work out the way we want them to and I ended up in bed with flu instead and had to cancel my flight. So, I have no travel news to share with you. 

I hope your plans for the festive season are going well. Our Christmas tree and decorations have just gone up with lots of help from my grandchildren. It's a bit later than usual but still in plenty of time to sprinkle some pre-Christmas cheer.

Till next time, happy stitching.

Tuesday, November 1, 2022

Dressing a Scroll Frame

Since refurbishing my scroll frame, that I wrote about in my last post here, I've now attached my linen to the frame. That too was quite a lengthy process. The book Whitework by Lizzy Lansberry, a Royal School of Needlework publication, and Jenny Adin-Christie's video on dressing a slate frame were both very useful guides (although a slate frame and a scroll frame are slightly different). These photos are a record to remind me of how I did it.

 To begin, I ironed the shop creases out of the linen and pulled a thread one centimetre from the edges.


That made it easy to fold over a straight hem and machine stitch it in place on all four sides. It's a fine linen and I thought it needed reinforcing. The side hems weren't a problem when the linen was later rolled onto the scroll bars, though it could be the case with a heavier linen.


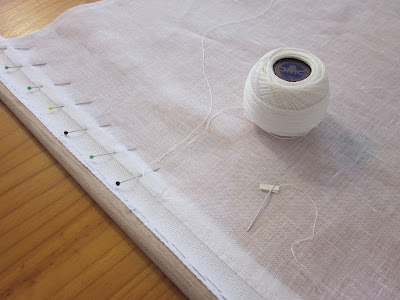
With plenty of pins to secure the linen in place, I stitched it to the cotton twill tape on the top roller bar, beginning in the centre and working outwards. Years ago someone gave me an unused ball of DMC Cordonnet 100. It's a nice strong thread for attaching the linen. I had to use a little slip of folded paper to coax the dense hard thread through the eye of my needle.


It was awkward stitching close to the wooden dowel and with the pins close by, so stab stitching was the best option. I found it interesting that the stitches are better worked at right angles to the dowel rod.


It's seldom that I use a thimble but this time my fingers soon got sore and out it came.


This is half way with the linen attached to the top and bottom rollers. I was able to roll up the excess linen and tighten the wing nuts to hold it really taut. So far so good.


Along the sides, I attached twill tape to the linen after I had rolled up the excess linen. This might not be the best way to do it, but if the thick tape was attached and then rolled up with the linen, I thought the layers of tape on the sides of the rollers might distort the fabric once it was under tension. It does mean that if  I need to unroll and work on that bit of linen, I'll have to re-attach the sides. For now that is in the distant future and by then I might have other plans for that small strip of linen.


I used Thread Heaven thread conditioner on the rough dry string so that it passed more easily through the tape. And the vicious-looking upholstery needle poked through the thick twill with ease. I was a bit skeptical about it. However, I soon became comfortable working with the long curved needle around the obstruction of the wooden sides of frame.

And here it is, all framed up. Setting up the linen in the scroll frame seemed like a lot of work, but once the string was tensioned, the linen was as tight as drum. There are no creases in sight, and it was well worth the time spent.


Working on the frame is on hold for now because I'm preparing to go to a family reunion in South Africa soon. I will take a couple of small embroidery projects with me. After all, what is a holiday without a little embroidery?

'Till next time, happy stitching! 

P.S. 30/01/2023 Jessica Grimm also has a video on dressing a slate frame here.