Showing posts with label pulled thread. Show all posts

Sunday, August 13, 2023

The back of the Embroidery

This is the back of my Daisy Band Sampler Pincushion. There was quite a lot of unpicking on that daisy row because I wanted a sequence that I could repeat all across the row and keep the back looking uniform. Below you can see how the thread enters and leaves each eyelet in the identical way. (Those little fluffy threads on the lower edge of the band of diagonal cross filling were snipped off when all the stitching was finished.)

Because the fabric used for pulled thread is usually a more open weave, threads carried across from stitch to stitch on the back may show through to the front. Any haphazard stitching on the back can often be picked up and it detracts from the finished embroidery. You can check for this by placing the embroidery over a dark background. It's then easy to make sure that no threads are either showing through holes or where they are noticeable and look untidy.

On some types of embroidery where the fabric is more closely woven, it's quite acceptable to carry thread across short spaces, but with pulled thread a little more care is a good idea. For neat pulled thread work it's important to keep a rhythm or regular pattern to the stitches. Each stitch should be worked in the same sequence, and pull in the same direction. 

Daisy Band Sampler Pincushion

Here's the finished embroidery. You can see more about the Daisy Band Sampler Pincushion in a previous blog post here.

Co-incidentally just after I finished writing this post, I listened to the latest interview with Yvette Stanton on Fiber Talk. Yvette and Gary discuss how useful it is to look at the back of the embroidery, not to check how neat it is, but to see exactly how the stitch was worked. There's a lot to learned on the back. 

'Till next time, happy stitching!

Wednesday, May 26, 2021

Pulled Thread Pincushion

The small pulled thread sampler I wrote about here and here is finished. 

The sampler was something I stitched just for fun, choosing the stitches as I went along.  I rather like the freedom of choosing and stitching rows of different stitches across a surface. It's also a way to try out stitches or their variations and see how they look on fabric, rather than in a book. Cobbler filling (just above the eyelets) was new to me.

Although my embroidered pincushions have always been square, the idea of making oblong pincushions has been at the back of my mind for some time. It's been one of those things I planned to do 'one day'. I like to do something useful with my embroideries and this little mini sampler seemed well suited to become a rectangular shaped pincushion. 

I auditioned some patchwork fabrics for the back and even sewed the green fabric on the left in place and started filling the pincushion. 

I liked the colours, but no. The fabric just didn't suit the front. 

So, linen it was. But first came the unpicking. The seams had already been trimmed and the corners clipped. A few threads unraveled as I unpicked, but nothing too serious. Finally, a backstitch row around the top and a matching row on the backing made stitching it up easy, with the two sides joined together with a whipped stitch.


I like the neat edge that the backstitch and whipping makes. 


Perhaps I'll make another pincushion this shape too.

'Till next time, keep well and happy stitching!

************************

Message to Email Subscribers

Blogger has let me know that the email subscription service to their blogs is ending in July. I am looking into finding a new subscription service. I would love to keep you as an email subscriber and will let you know what happens.

************************

Monday, January 11, 2021

Pulled Thread Tangram

Pulled Thread Tangram by Tricia Elvin-Jensen

As a child did you ever play with the shapes of a Tangram puzzle and see what designs you could make with those seven pieces? (Click here for instructions on how to draw your own Tangram shapes.)

Imagine using those shapes to design an embroidery. The Embroiderers' Guild of New South Wales in Australia issued a challenge to their members to do just that - create an embroidery based on the Tangram. 

Oceans away and through the Cape Embroiderers' Guild in Cape Town, my stitching friend Tricia Elvin-Jensen heard about the 'Yellow Envelop Challenge'.  Although not a member of the NSW Guild and therefore not officially able to take part, she nevertheless set to work using her favourite techniques of drawn thread and pulled thread embroidery. And, she challenged herself in another way too and created this beautiful embroidery.  

Tricia-Elvin Jensen

Taking the Challenge  requirements into consideration and with careful measurement, Tricia was able to adapt a UFO she'd started previously. The edge picot row, the outer drawn row and the flower meander row had already been worked.  The grid of the top border and the drawn thread strip at the bottom had also already been prepared, and she decided to fill those drawn areas and the side borders with geometric designs to echo the shapes of the Tangram.

So far so good, but things didn't quite all go as planned. While embroidering the new central Tangram design, Tricia said she mistook her central marking line as a division in the medium triangle and ended up with two smaller triangles - each filled with a different pulled thread stitch pattern. At that stage she said, 'there was NO ways I was going to undo either of those areas'. I think we can all identify and sympathize with that. 

Tricia Elvin-Jensen

Besides taking part, completing the challenge and finishing a UFO, the project proved to be a great incentive for getting Tricia back into embroidery after having had back and eye problems. It also helped her over the very strict lockdown rules of Covid19 in her retirement village.

With kind permission of the New South Wales Embroidery Guild and to inspire you even further, below are the three winning entries of the Yellow Envelop Challenge stitched by their Guild members. Congratulations! 

1. Sue Slattery

2. Frances James

3. Denise Pennell
'Till next time, I hope you find much to inspire your stitching. Perhaps you too can take a UFO, change your original intentions and complete a beautiful piece of embroidery.

----------------------


Tuesday, September 22, 2020

A New Pulled Thread Book - in French

I received a dictionary of pulled thread stitches for my birthday last year. Unfortunately for me, it's written in French. The languages I studied at school were Engish, Afrikaans and Latin. I don't speak a word of French. Or Latin.

The first thing anyone says when I mention that the book is written in French is 'Just use Google Translate.' And certainly, I found the translations useful. It's when I got to the technical terms that things became less clear. One translation amused me. After all, does one really use 'wire' for pulled thread embroidery? I did sort that puzzle out pretty quickly though.

Mary Corbett's review of a needlelace book, translated from the original French, alludes to the tricky question of translating specialized embroidery terms in a meaningful way. I can see now that not only is a bilingual person required for the translation, but preferably one who is familiar with all the very specific terms too. You can see Mary's comments in her blog post here.  Anyway, overall, I think I got a fair sense of what the text in my new book is covering.

The book itself is beautifully designed and a pleasure to page through and study. The graphics are clear and self explanatory. There are also diagrams of how the back of each stitch should look which is useful for making sure that you are working the stitch in the correct direction and the right sequence of the steps. The depth of information and care with which it is presented is remarkable. I'm just sorry that my photos don't do it justice.

The book covers the basic pulled thread stitches beginning with Satin stitch, goes on to Four-sided stitch, and includes Wave stitch, Faggot stitch and a few others. There are also many variations of these basic stitches, together with a photo of the stitched example. Finally there are combination stitches also with beautifully embroidered stitch samples.

The book Jours fils à resserrés by Marie-Helene Jeanneau was published in 2019 by Neva. Sadly Marie-Helene passed away the previous year. The book is labelled Volume 1.  How I would love to have seen what she had planned for Volume 2. 

Although I got the gist of the book and the stitch diagrams were clear and easy to follow, I would still like to be able to accurately interpret every word.  I think there is a wealth of useful information and technical know-how tucked away in those (to me) unfathomable French terms. 

I contacted the publisher to enquire about an English version of the book. He did say that there was an intention to translate it at a future date, and that it may be published by another publisher. I'll keep a lookout for that.

'Till next time, happy stitching!


Sunday, May 26, 2019

Pulled Thread, No Frame

Pulled thread work should be done in a frame or embroidery hoop. That seems to be the generally accepted wisdom and that's the way I have been doing it.


Then I came across an old book which mentioned stitching pulled work in the hand. Really?! I wish I had kept the reference and not glossed over it and dismissed it because I realized later that although I was used to working with an embroidery frame, I had never really found it particularly comfortable.

About to start on a small pulled thread sampler, this seemed like the perfect opportunity to try out the idea of working in the hand without a frame. At first figuring out where to put my fingers and hold the linen was very awkward and I almost gave up. It was difficult to keep the fabric threads at right angles to each other so that I could count the threads and get the stitch pulling in the right direction.


But once I had figured out how to hold the fabric I found it most pleasurable. It's a more tactile experience having the cloth slide through your fingers as you move the linen and line it up for the next pass of the needle. And doesn't linen feel good? Also I seemed to have much better control of just how much tension to apply to each stitch. This may have been because it was an unfamiliar way of working and I was paying close attention to every stitch and each pull on the thread.

The more I worked the more I began to 'feel' the fabric in my fingers and the better I was able to control the tension and keep the fabric threads at right angles to each other.  I found it useful to be able to get my fingers right to the area where the needle is forming the stitch. The other advantage is that you can use a sewing motion of scooping up the fabric rather than the stab stitch method. This made it far quicker. The other plus for me was that I found working withour a frame easier on my fingers and shoulder.


Working on a large piece of linen may be a different story, but for now I am reasonably pleased with the result. I'm not throwing out my embroidery frames just yet, but stitching in the hand is a good exercise in concentration that makes you focus on the formation of each stitch and it's good practice for paying attention to the tension. That's been good for me as I tend to work too tightly.

I'd love to hear of your experience of doing pulled thread embroidery without a frame or a hoop.

Till next time, happy stitching.


Monday, September 5, 2016

Making up Kits

Long time, no blog post! Winter's unwelcome bugs made themselves felt here and things rather ground to a halt for a while. I have done no stitching for weeks but I did do something embroidery related.

Dresden Lily by Lyn Warner
Unfortunately I had to cancel my Dresden Lily pulled thread class that I was scheduled to teach at Ighali*. Talk about disappointing! I was so looking forward to it. Apologies again to everyone who had booked and who at the last minute had to transfer to other classes. It seems I missed a most wonderful embroidery convention this year. You can see some photos here on the Cape Embroiderers' Guild Facebook page.

Even though I would not be going to Knysna to teach at Ighali, I was very pleasantly surprised when I was asked to send along my kits. I had done some preparation and thought it would be quick to finish assembling them, but somehow kits always take longer to prepare than I expect.


Not feeling my best, I did a little each day and I even had my very sweet cleaning lady to help measure out the thread on the day when she came in to work.


In the end the kits were completed. Linen cut and edged, printing done, envelopes ready, threads labelled and notes tweaked.


Carefully checking the contents for each kit, almost there...


I intended to try and avoid any plastic packaging but in the end I decided that it would keep the materials clean and safe. Better safe than sorry - echoes of my mom and my gran there. The ziplock bags can also be used to store the work in progress.


Happiness is ... finally slipping the printed instructions and the materials into their prepared and labelled envelopes. I was so pleased to have this step completed that I forgot to take a photo of the kits all packed and ready to go. 


The other photo that I missed taking was putting the envelopes into a large Corn Flakes box for the car trip to Knysna!!! Well, maybe not elegant, but everything did arrive safely. I had lots of help, and offers of help along the way, and I thank everyone for the part they played in getting the kits to their recipients! 

By next time, I hope to have tracked down the little project I worked on some time ago but couldn't reveal at the time.

Till then, happy stitching!
_________

*Ighali means 'threads' in one of the 11 official languages in South Africa and is the name of a national embroidery convention held every two years.
Acknowledgement: The Lily was adapted from a photo with permission of owner and author Heather Toomer.

Friday, March 4, 2016

Ighali 2016 - Dresden Lace Pulled Thread Lily

This year the Ighali Embroidery Convention is in August. It promises to be a lovely event, set in beautiful Knysna, and with some noteworthy teachers and classes. You can find out more about it on the Embroidery Network South Africa website here.

At Ighali I hope to be teaching a pulled thread course, "A Glimpse of Dresden Lace - Pulled Thread Lily", using traditional Dresden Lace stitches and techniques - that is if there are enough embroiderers who would like to join us to learn about 18th century embroidery methods and some challenging stitches. All the details of the class are in the class brochure which you can download from the ENSA website.

Dresden Lily on linen - Lyn Warner
Originally, I experimented with using a very fine cotton muslin for teaching these techniques and although the results were good, I found that in a class situation, working on such fine fabric presented extra challenges for students.

Dresden Lily on cotton muslin - Lyn Warner
As a result, the class kits for the Dresden Lily at Ighali will contain linen which is both easier to work on and more forgiving of any hasty unpicking. I will also have a small quantity of muslin available for anyone that wants to try it out on their own at a later date.

Bookings for all classes are via ENSA but if you have any questions about my course email me directly at lynette[dot]warner[at]gmail[dot]com. Apologies for the cryptic address. It's to avoid spammers picking it up with their webcrawlers.

In the meantime, happy stitching!

---------------

Design adapted with permission of Heather Toomer, Embroidered in White: 18th century

Monday, September 28, 2015

Eyelet Border in Pulled Thread Embroidery

This little eyelet is my favourite pulled thread stitch at the moment. One row forms a delicate pulled work border.


Two rows are even prettier.


To work the stitch, bring the needle up through the fabric at 1, shown next to the black dot, and follow the numbers in the stitch diagram. Each stitch is over three threads and you always go down into the centre of the eyelet. Work each leg of the eyelet twice.


Pull the thread moderately when you bring your needle up through your work. Take care however when you come up after that long stitch, at 9 and 17. It's rather easy to pull that long stitch too tightly.

Till next time, happy stitching!
Saturday, June 6, 2015

Hedebo Tea Cosy - Drawn Thread

I haven't done a lot of stitching recently, but I have made a little progress on my Hedebo tea cosy. The surface embroidery has been completed and the drawn thread work is well underway. You can read more about this project in previous blog posts here and here.


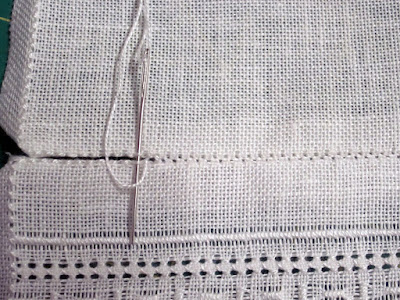
Below you can see that the pretty little pulled work border around the sides is complete and I have started cutting threads and filling in the openwork areas. I started with the small less important areas, leaving the central motif until I had had a bit of practice.


Each openwork or drawn thread area is outlined by the two rows of chain stitch so characteristic of Hedebo embroidery.


In these drawn thread areas, I cut 2 threads and skipped 2 threads in both directions. I strengthened the grid with ordinary sewing machine cotton because I wanted the whipping and the underlying grid to be unobtrusive.

For the large rectangular area of drawn thread work at the bottom I carefully counted and tacked over every 2 threads to mark the threads I wanted to cut. Its's a big area and I didn't want to miscount somewhere and have to fix up any threads cut by mistake. Why the blue and red tacking?


I started with the pale blue thread but that didn't show up too well, especially at night. The bright red was much easier to see. I won't leave it in the embroidery for too long in case there is a transfer of it's strong red colour to the linen.

Also, when I changed to the red thread, I began at the side by going under the first two threads to be cut, as you can see above. The plan was to slip the point of the scissors under each pair of threads where the red thread lay underneath. Anything to make the cutting easier and more foolproof!


I have eased out the cut threads one by one and trimmed them off close to the satin stitch border. Next I'll strengthen the grid as before by whipping over the grid intersections with machine sewing thread. Finally I'll weave in the decorative filling.

The end of this piece of embroidery is in sight. It will be good to finish it but I still have to decide if it is actually going to be a tea cosy or if it's eventually going to be something else.

---------------

On a different note, I am back from a long anticipated reunion of Rod's family. It's been a few years since the four siblings and their spouses were all together. We met up in Sedgefield on the beautiful Garden Route and spent a very happy time taking long beach walks, having fabulous home cooked meals, and catching up and sharing fond memories. With the family scattered all over the country, and the globe, getting together is difficult but we all left Sedgefield with the firm intention of having another reunion before too many years have passed.

Winter arrived surreptitiously while we were away and being back home in Cape Town has been a bit of a shock weather-wise. Temperatures have dropped and the first big, but very welcome, rains have fallen. Perhaps with the cold weather here it's time to stay indoors, keep warm and take out the embroidery.

Till next time, happy stitching!

Tuesday, April 9, 2013

Textile Museum

Jubilee House in Dorp Street, Stellenbosch houses a collection of beautiful embroidery and lace. The building, originally the annex of a hotel next door, is now a National Monument and the headquarters of the Cape Women's Agricultural Association. If you are particularly interested in whitework or know of Hetsie van Wyk's rich and beautifully executed embroidery and would like to see some of it, then this is a little treasure of a museum to visit when you are in or around Cape Town.

The museum is open Monday to Friday 9-12am, with a small entry fee. It has few visitors so if you find the doors locked, like Gill and I did this morning, just knock or ring and the secretary will open up for you.


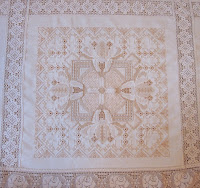
On the way upstairs a stop in at the committee room revealed a tablecloth made of 18 separate embroidered squares, joined with lace insets, and each one a different design and technique. The photos are unclear but they do give some idea of the amount of work in the cloth.


Then we noticed a Hardanger cloth in use on a trolley with large (did I say large?) openwork areas. The beauty lay in the evenness of the tension.


One room is dedicated to embroidery with 30 examples of Hetsie van Wyk's work in the glass cabinets. This was what I had come to see. You should have seen Gill and I on our hands and knees examining some of those treasures on the bottom shelf!

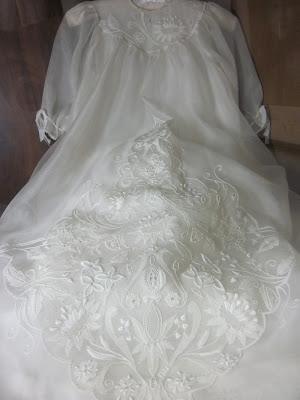
 I just loved these two christening gowns.


The christening gown on the left is Carrickmacross, the technique similar to the embroidered lace on Kate Middleton's wedding dress when she married Prince William. And the one on the right is delicate shadow work. The lace was also made by Hetsie, some of which is hidden underneath on the petticoats! Here is a closer look at the Carickmacross gown:


Carrickmacross embroidery detail - the flowers are appliqued and then fine patterns are darned into the net. The picots on the edge are known as 'twirls' and the eyelets are 'pops'
This is the shadow work gown with a glimpse of the lace on the petticoat showing through the fine fabric:


This post is growing rather long. I'll put up more photos in the next one. Till then, happy stitching!