Friday, June 27, 2014

Free Craft Emagazine

I came across a link to a crafty lifestyle magazine in Anna Scott's latest blog post. The magazine is called Tickle the Imagination and you can have a free peek at the magazine online here.

christmas 2013

Anna's very pretty embroidered hot water bottle cover appears in the magazine with instructions on how to embroider and make it up.

Photo used with kind permission of  Anna Scott

If you enjoyed seeing Anna's woollen blanket in fresh blues and red in Issue 81 of the Inspirations magazine, you will enjoy finding the matching hot water bottle cover too.


insp_81_img
 
Visit Anna's blog here to see some of her other wonderful embroidery.

Friday, June 20, 2014

Cotton Organdy and How to Find Threads Per Inch

A new sample of cotton organdy arrived in the post today. I have been looking for a really transparent cotton fabric for fine pulled work and this one is really beautiful. The big question for me is whether or not I can see the threads well enough to count them and work the pulled thread stitches.

The first thing I do when I find a new fabric that may be suitable for counted thread work is determine how many threads per inch it has. I do this so that I can use this thread count when I am working out the size of the embroidered design. It also gives me a good indication of how well I can see to count the threads to do a piece of pulled thread embroidery.

I mark out a one inch square on the corner of the fabric with tacking stitches as you can see on the 28 count linen below. (If I'm in a hurry, I just use pins to mark out the square.) I find this little one inch square useful to go back to later if I can't remember just how many threads per inch the fabric has. Its quick to recount if the square is already tacked out on that piece of fabric sitting patiently in your cupboard.


Use a ruler and carefully mark off a one inch (or 2.5cm) square. Then start on the left hand side of the square and count the threads you cross as you move from left to right. I usually place a pin in the fabric after 20 threads. This makes it easier to check and also helps if you loose count as you get towards the end and your eyes start to jump and play tricks on you.

Then do the same to count the threads from the top of the square to the bottom. If you count carefully you will see that there are actually 29 threads in each direction on this fabric. (The fabric has 29 threads per inch (t.p.i)). Although this was sold as a 28 count fabric, I have found that its not unusual for a fabric to have a slightly different thread count and for the count to vary by one thread, either more or less.


Now to count the threads on the organdy. You can see that it is a much finer fabric. I marked out the one inch square and started counting across from the left hand side, placing a pin every 20 threads - the yellow and green pins. You will see that there are 4 groups of 20 threads going across and the last group has 14 threads, making 94 threads per inch across the fabric.

Now counting down there are 3 groups of 20 threads and the last one has 10 threads, making a total of 70. The fabric has 94 warp threads per inch and 70 weft threads per inch. The fabric is not evenly woven. You may notice that the little area formed by the pins with 20 threads on each side is rectangular in shape and not square. But when working on such a small scale I have found that this difference does not greatly affect the outcome of the embroidery, unless you are working a pattern in one direction down the fabric and then the identical pattern at right angles to it and you want them to look exactly the same. I have also noticed on some old finely worked embroideries that the fabric was not evenly woven either, though it appears so at first glance.

One other small matter to consider if I want to do pulled work is "Can I see the threads to count them and stitch accurately and consistently?" Mmmm... The organdy is very fine and I think its at the limit of what I can see to work on even with my magnifiers. Perhaps investigating a stronger pair of magnifiers is in order to tackle a fine fabric like this.


Saturday, May 24, 2014

Altar Frontal by Jenny Adin-Christie


You're in for a real treat today! I've been corresponding with Jenny Adin-Christie about a project she did for Inspirations magazine some time ago. In our correspondence, Jenny mentioned that she had just completed a church commission and she has since very kindly given me permission to share her photos and details of the work with you. You may recognize Jenny, a graduate of the Royal School of Needlework, as being one of the embroiderers who worked on the beautiful lace wedding dress worn by Catherine on her marriage to Prince William.

I have put together extracts from Jenny's email, together with a summary of some of the key elements taken into consideration in the development of the design for the embroidered altar frontal. Knowing a little more about an embroidery, and how it came to be, adds another layer of enjoyment for me and I hope you will enjoy this behind the scenes look too.

Jenny says, "[The commission] was for St Lawrence’s Church, Weston Patrick, Hampshire..."
 
You can see the church here on Flickr.
 
"It has a fabulous Victorian interior (although the origins of the church are much earlier), and was designed by Thomas Henry Wyatt." 


The altar before with Rubelli cloth draped over it


"Much of the hand painted wall decoration was covered under white paint until a recent discovery led to a full restoration program. The PCC commissioned me to create an All Seasons frontal for the altar to replace exiting frontals which were rapidly degrading, and to compliment the restored interior."

Later you will see these two restored design details picked up in the embroidered frontal.


Painted foliate border surrounding stained glass windows 


Starred ceiling


You can see another photo of the interior of St Lawrence's Church which shows the painted walls and the ceiling here and here on Flickr.

Just a few words about the design before we see the finished piece. The design of the embroidery was largely inspired by the bold metal work cross on the lid of the octagonal font in the church. 


Cross on metal work font lid


The cross has been combined together with a quatrefoil motif and an outer circle, signifying the circle of life. The quatrefoil was inspired by forms within the wooden arches of the church roof, and also by the tile-like pattern in the stained glass behind the altar.

Now to see how it all comes together in this stunning embroidery...


Altar frontal by Jenny Adin-Christie 


I have to say that when I saw this photo I found it difficult to believe it was actually stitched and not painted. Its an effect that Jenny says she deliberately sets out to achieve with her embroidery.

The colours for the embroidery were chosen to pick up the neutral tones of the floor and walls, the blue of the painted ceiling and the jewel-like reds, purples and jade greens of the stained glass windows. The strong jewel colours were however kept to a minimum, to ensure that the appearance of the frontal did not compete with the stained glass behind it. The golden yellows used in the quatrefoil link seamlessly with those in the stained glass above and serve to draw the eye up towards their central focus of the crucifixion.
 
And here is the completed embroidery in place on the altar.


All Seasons altar frontal by Jenny Adin-Christie 


Being embroiderers, we always want to know a little about the actual stitching, at least I always do, and Jenny has shared some of her techniques with us:

"I use a lot of machine embroidery over laminated layers of fabric to build a decorative and durable base for the piece. Machining adds texture and interest but with greater speed and also makes the fabrics more durable for use in a public space. This is then worked into with lots of hand stitching and use of traditional metal threads to define and highlight the key areas of the design. The stars and mini roundels are formed from pleasted plate."


Edging stained glass sections with metal threads 


Applying tile motif to the cross 


Completed gold star


One final little detail that I found fascinating is that the embroidery remains separate from the altar cloth. Jenny explains, "Once complete, the design is mounted onto board which is then attached via a special mechanism to the front of the altar, with the draped altar cloth behind. The embroidery can therefore be removed to allow cleaning of the cloth, and the church will eventually have other coloured cloths to use behind the embroidery. This solves a great many issues experienced with frontals where the embroidery is worked directly onto the cloth."

 
There is not much to add after seeing this wonderful embroidery except to admire the fabric of the altar cloth itself which forms a rich backdrop to the embroidery and to marvel at the expertise with which the embroidery has been mounted in front of it so that one doesn't suspect the two are quite separate. 

Thank you for sharing your beautiful work with us Jenny!

Please leave your comments below. Jenny would love to hear from you.

 To see more of Jenny Adin-Christie's work you can visit her website by clicking here.

Embroidery patterns


Sunday, May 18, 2014

Drawn Thread Bag

This is the little drawn thread bag I was busy finishing off a few weeks ago and mentioned here. It was started in a class by Moyra McNeill.


Finding the matching thread to complete the woven bars at the top turned out to be quite straight forward and they stitched up really quickly. Next was trimming all those little satin ribbons down the front and gently melting the edges with a flame so they won't unravel over time.

 
The one job I did not want to tackle was trying get a lining to fit neatly inside the bag. A little careful measuring and stitching and that went ahead smoothly too. Why ever did I leave it aside for so long?

 
When Moyra gave us the kit with the hessian fabric and I went off to look for threads, ballet pink jumped out  at me. It seemed to soften the hessian and liven it up. Thinking of my daughters' ballet days I am always reminded of lots of pink satin ribbon and the long ribbons spilling off of ballet shoes. The ribbons may not be too practical here but they are nice to run your fingers up and down and to play with.
 
 
The threads used for the stitching are a soft hessian colour and the ribbons threaded through the holes at the top are both ballet pink and hessian brown. I rather liked the trailing threads at the bottom so trimmed them just enough to straighten them up, but not shorten them. I wonder if my granddaughter will ever do ballet?
 
Since my last post I have been working away on my book charting stitches. Its a slow process but oh so challenging and I am enjoying it immensely. I am trying to get all the stitches charted while they are still fresh in my mind. Later comes the stitching up of samples.


Thursday, April 10, 2014

This, that and a new embroidery book

This is a short post to say that I may not post for a while. I am working on my book and have some immediate deadlines coming up that I want to meet.

Its quite early in the whole process so there is not much to tell yet besides to say that it is a book on whitework and that it will be quite a while before it is completed. Rereading that sentence I should say that it is so early in the process that I'm not yet convinced there will actually be a book, but at the moment that is the long term goal.

As the one piece central to the book is leaving the country soon, I have had to have the first batch of photographs taken which left my head whirling yesterday. I can't wait to see those photos. I seem to have got ahead of myself but perhaps its a good incentive now to keep going with the book.

On another note, I did finish (after 20 years!) my drawn thread bag shown in my last post. The lining is in and it is no longer a UFO. That is worth a teeny little celebration. When I get the chance I will take some photos for the blog.

Till next time, happy stitching!

Friday, April 4, 2014

Finishing a Drawn Thread UFO

Following a request at the local embroidery guild to exhibit the drawn thread bags we made in a workshop with Moyra McNeill, I dipped into my box of work in progress, otherwise known as unfinished objects or UFO's. I was momentarily stunned when I realised that Moyra visited South Africa in 1994. That is 20 years ago. Wow! Where did those years go to?

Bag started with Moyra McNeill
I'm always curious about why some things like my bag don't get finished and others do. For me there seem to be three main reasons.

The first is variety. I so admire those people who can work on one project at a time and see it through to completion before beginning another one. I seem to always have a few projects on the go at any one time and move from one to the other as I start losing interest or strike a small challenge. Rotating between projects seems to make them fresh when I get back to them after a little break. Lack of variety however was not an obstacle to completing my little drawn thread bag. I enjoyed stitching it and because it moved along quickly, it remained interesting.

The second reason for my UFO's is that often when I start out on a project I have this mental image of just how perfectly it is going to work out. Well, reality is not quite like that, is it? Things sometimes don't quite match up to expectations and sometimes for me that means they end up in the UFO box. Again, that was not the case with this project. I was quite happy with the way it was turning out.

This brings me to the third reason for my ever expanding UFO collection. Its the finishing off. In this case I just couldn't figure out how I was going to fit the lining into the bag neatly. More importantly, how to do it without too much fiddling to get it right. This was definitely my stumbling block here.


To finish the embroidery on the bag I needed another row of woven bars at the top to complete the holes for the drawstrings. Moyra had suggested weaving every second group of threads into woven bars. This I did down the front where the ribbons are tied on.


But at the top I wanted to weave over all the threads and not leave some loose threads as Moyra had suggested. Now because of this I ran out of the DMC stranded cotton I was using, with the bars across the back still to complete.  Usually quite careful about keeping the little tags with the colour number on it, somehow I lost the little tag.

A quick visit to our local embroidery shop, ThreadNeedle Street and I found the thread. Its an almost exact match after 20 years. Does that say something about DMC threads!


OK, now for the lining ... well, I hope to have more on that next time.

Tuesday, March 18, 2014

Dresden Lace Course at Ighali 2014

The brochure for Ighali 2014 was published last week. Now I can tell you about the Dresden Lace course I have been planning to teach there. Let's just hope that I have enough ladies to fill a class.
The embroidery festival "Tribute to the Needle" will take place in Port Elizabeth from 25 to 29 August. The main focus of the festival is teaching and the full brochure is available on the Embroidery Network South Africa website ENSA here. There are also lunch time lectures to attend, vendors for shopping and an exhibition of embroidery from 26-28 August, so lots to see and do.


My course is titled "A Glimpse of Dresden Lace - The Lily" and will run over 3 days. It will cover the techniques of Dresden Lace and give students the opportunity to work on a fine cotton muslin in the style of Dresden Lace and practice some rarely seen pulled work stitches.

I was first invited to submit a proposal to teach at Igahli in October 2012. I had just arrived in Brisbane for the birth of my granddaughter and it was a full 3 months before I returned home and could start work on my idea. Its been a long time since that initial exciting email and its really nice to finally see the brochure out.

Sunday, March 9, 2014

Damp Stretching Embroidery

 
In my last post I set out to find a cork board to use to damp stretch or block my embroidery. The embroidery I wanted to stretch is a working sampler I have been using to test out stitches for a small project I want to do. I wanted to see if the wrinkles between the rows of stitched blocks will be smoothed out with the stretching.


I started in the middle and pinned outwards along each side, alternating sides as I went, and stretching between each pin I placed.  
 
 
You can see how each side of the linen is slightly distorted at the top and the bottom. That should even out when the fabric is stretched on the other two sides as well. The thimble came in handy when my fingers started to complain. I had to push quite hard to get the little round headed map pins firmly into the cork so that the tension on the fabric would not dislodge them as I pulled and stretched. 
 
 
At this stage I ran out of map pins. There were still a few wrinkles on the top half especially on the right so I went back and stretched out the linen a bit more. I had no idea just how hard I should pull.


There was also a bit of a bulge at the top right and bottom left of the fabric.

 
The second lot of map pins I tried have a flat head which is much easier on the fingers if you are going to be using a lot of them to pin a large piece of embroidery. I found that the actual pin part is quite thick compared to the white-headed pins I started with and I will be extra careful when I try them out on a finer fabric.

 
This part to me was like magic. Once all the pins were in and I sprayed the fabric, the wrinkles started to disappear! I thought they would vanish as the fabric dried, but immediately the linen started to get wet the wrinkles started to flatten out before my eyes.

 
I must admit I did rather get carried away with using my new spray bottle and in the end I wet the linen quite thoroughly, more than I intended to do.


Next morning it was all dry and when I removed the pins the linen looked and felt like new. The other nice thing I observed was that the stitching remained all rounded and fresh looking, a definite advantage over the steam ironing I have tried in the past. 

 
I could see along the edge that I had stretched it a bit more in some places than others and the edge was not perfectly straight. 
 
 
I put the pins in just inside the edges that I had zigzagged. None of them frayed out the side threads of the linen, something I had wondered about.

 
This is the area that was originally the most wrinkled. I didn't know how much to stretch out the linen but I think I can pull a bit harder next time I stretch it and try to get rid of those feint wrinkles that are still there. You can only see them if you look for them but they need to come out next time.
 
Thanks again to Karen Ruane for sharing how to stretch an embroidery on her the blog and for answering all my questions.  I will definitely stretch my embroideries in future rather than trying to iron them.


Friday, February 28, 2014

Stretching embroidery and finding a cork board

Most embroiderers will know that the way to flatten out your embroidery once it is complete is to damp stretch it. But do we all do that? Mmm...  well, not me.

I did try stabbing pins into my ironing board to stretch out and hold my damp linen but the pins didn't go in properly or stay in very well once I started stretching out the fabric. In the end I simply steam ironed the work face down on a thickly folded towel, pulling at various points as I went. Not too good either because the towel left little rough marks pressed into the linen and if I pressed down too hard the threads, especially the numbers 8 and 5 perle cotton, would flatten out and look squashed and sad. The thing to use seemed to be a cork board and damp stretching. I did look for a board from time to time but they have been a little hard to find.

For some time I have been reading Karen Ruane's stitching blog and besides the beautiful photographs of her work I was fascinated by how pristine and crisp the embroidered pieces always look once they have been damp stretched. Karen kindly sent me the link to a post on how she does the stretching and you will find it here. She uses a cork board.

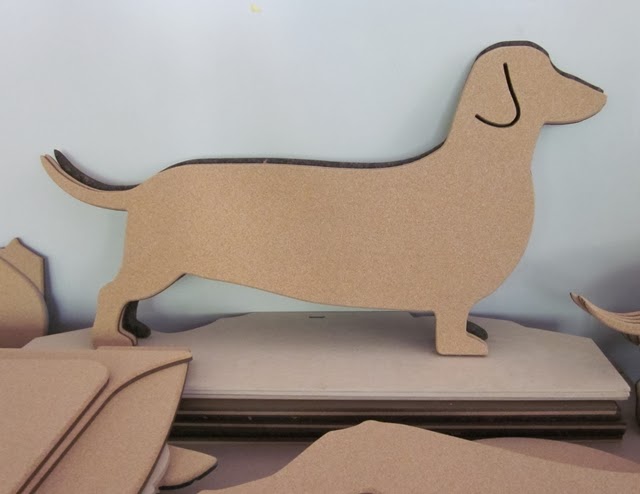
After some more determined searching (what did we do without Google?!) I found cork boards made by Andrew Lundin at Get Cork here in Cape Town. Andrew was extremely helpful in making sure I got what I wanted, advised me on what type of cork may be suitable, kept in touch with me about the progress of the shipment of cork he was awaiting, and finally the making of the board. You can have a board made to size and if you are looking for an unusually shaped cork board this is where you will find one. I couldn't resist snapping this one in Andrew's workshop.


With my board safely home I did a test stretching with a white handkerchief just to see how it went. The damp cotton picked up very slight pale orange marks in 2 places in the centre, and where the pins pierced the fabric a ring of colour about 5mm in diameter also appeared around each pin. (Sorry I didn't take any pics). Further advice from Karen was that some cork does seem to give off colour and that sealing the cork works well.

My dear husband took on the task of the sealing and 5 coats later, though the instructions recommended only 3, I have a very nice sealed cork board to use.

 
This is the sampler I want to stretch. Its pulled thread work and the linen has become quite distorted between some of the rows of pulled thread squares. The question is: Was my tension far too tight - I do tend to work tightly - or will the wrinkles stretch out?

 
I'll take some pics as I go and put them up on my next post. Till then happy stitching!


Monday, February 24, 2014

Roses

A friend and I spent the morning picking roses and having coffee under the trees at Chart Farm during the week. I was surprised that there were any roses to pick after the heat wave we have had. The colours in the rose gardens were so enticing but I tried to stick with pinks.

 
The buds opened really quickly and the colours are glorious. I put them in the passageway between my sewing room and the kitchen so I could stop and smell the roses every time I went past. 

 
The best scent is from the cream rose with the deep pink-tipped petals.